RV Hookups for Beginners: Water, Electric, and Sewer Explained
RV hookups can feel intimidating on your first trip, but the basics are easier than they look. Once you understand what each connection does and follow the same setup routine every time, campground arrivals become much less stressful.
This beginner-friendly guide explains water, electric, and sewer hookups in plain language so you can connect safely and confidently. Whether you are staying at a full-hookup site or a campground with only some utilities available, learning the basics will help you arrive better prepared.
What RV hookups are and why they matter
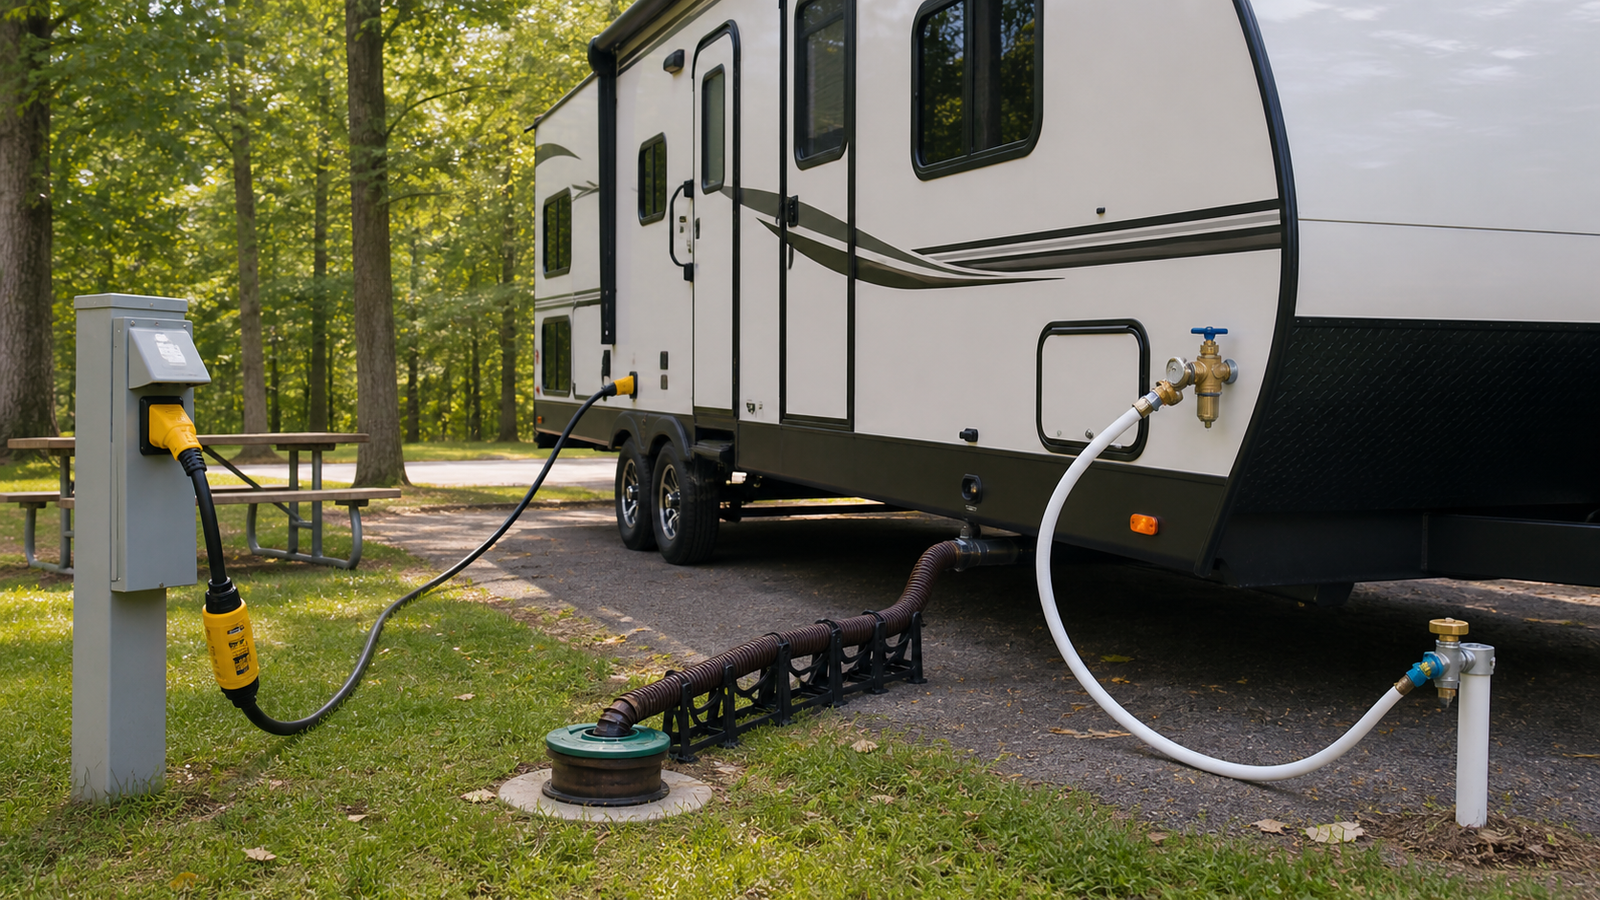
When RVers talk about hookups, they usually mean the three main campground connections that keep your rig functional: fresh water, electrical power, and sewer. Each one supports a different part of daily RV life, and each one comes with its own basic setup steps.
- Fresh water gives you water for drinking, cooking, washing dishes, showering, and flushing the toilet.
- Electrical power runs lights, outlets, appliances, air conditioning, and other systems when you are plugged into shore power.
- Sewer lets you manage wastewater from your sinks, shower, and toilet in a safe, sanitary way.
Learning how these hookups work helps you avoid common beginner problems like leaks, tripped breakers, bad-smelling tanks, or setup confusion at check-in. It also helps you protect your RV from unnecessary wear and tear.
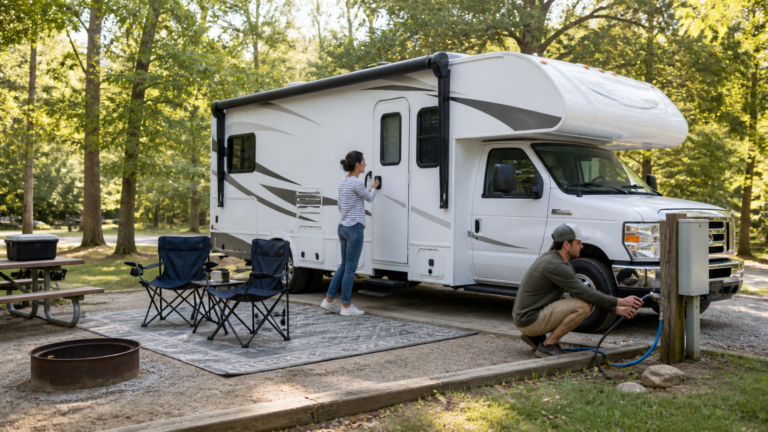
Water hookups: gear, pressure, and connection steps
Water hookups are usually the easiest part of setting up camp, but a few simple precautions make a big difference. The goal is to get clean water into your RV without exposing your plumbing to too much pressure or using the wrong hose.
What you need for a basic water hookup
- A drinking-water-safe RV hose
- A water pressure regulator
- An inline water filter if you want extra filtration at the campground spigot
Using the right hose matters. A potable water hose is designed for fresh water use, while a regular utility hose may affect water taste or cleanliness. A pressure regulator also helps protect your RV plumbing from campground water pressure that may be higher than your system can comfortably handle.
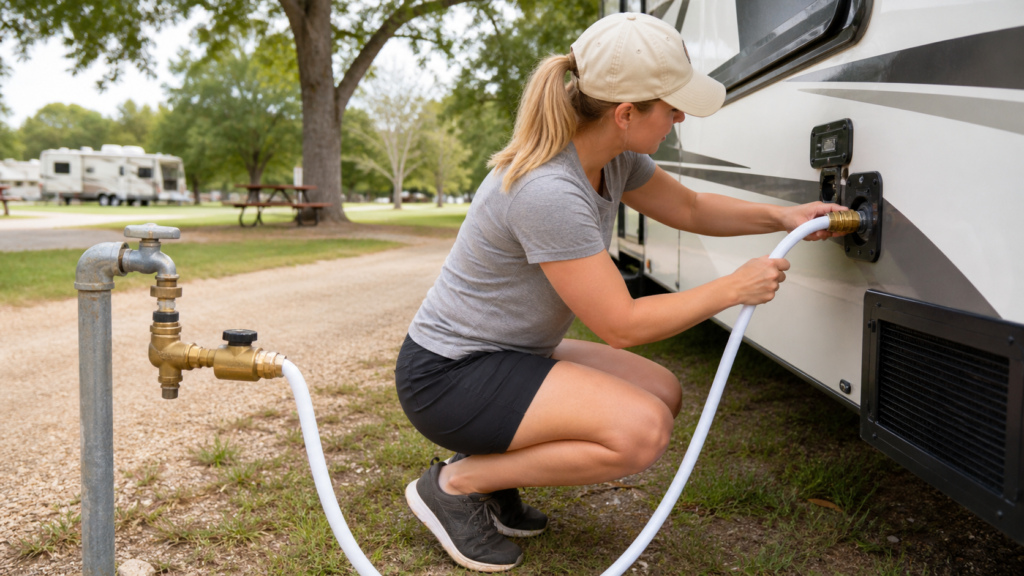
How to connect your RV to campground water
- Make sure your RV is parked and your water connection point is easy to reach.
- Turn off your RV water pump before connecting to city water.
- Attach the pressure regulator to the campground spigot.
- Connect your potable water hose to the regulator and then to your RV water inlet.
- Turn the spigot on slowly and check for leaks at both ends of the hose.
- Go inside and test a faucet to make sure water is flowing normally.
Common water hookup mistakes
- Using a non-potable hose for fresh water
- Skipping the pressure regulator
- Forcing threaded connections too tight
- Ignoring small drips that can turn into bigger leaks
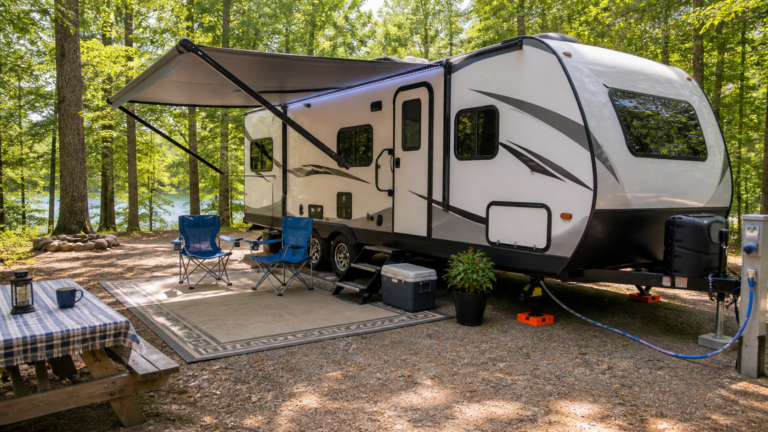
Electrical hookups: 30-amp vs 50-amp and safe setup
Electrical hookups give your RV access to shore power at the campsite. That means you can run lights, charge devices, use outlets, and operate major appliances without relying only on your batteries. For beginners, the most important part is connecting to the correct service and protecting your RV from pedestal or voltage problems.
What beginners should know about RV power
- 30-amp service is common for many smaller RVs and usually requires more careful power use.
- 50-amp service is common on larger rigs and gives you more room to run multiple appliances at once.
- A surge protector or electrical management system can help protect your RV from voltage problems and campground pedestal issues.
If you are not sure which service your RV uses, check your owner documentation or look at the power connection on the outside of your rig before your trip. Matching your RV to the correct campsite power is one of the easiest ways to avoid frustration.
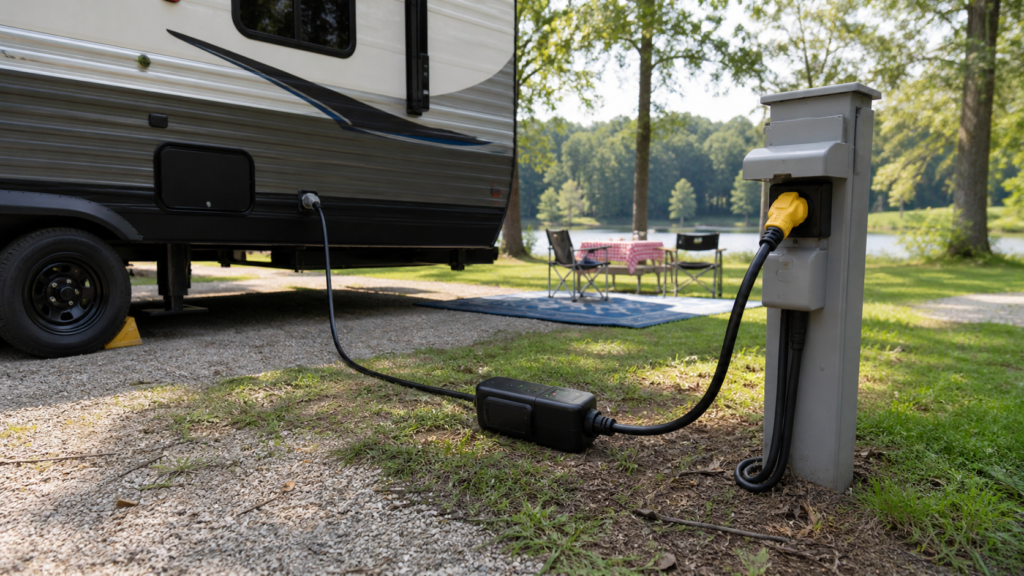
How to connect shore power
- Turn off high-draw appliances inside the RV before connecting power.
- Inspect the campground pedestal and your power cord for obvious damage.
- Connect your surge protector or electrical management system at the pedestal if you use one.
- Plug in your RV power cord securely.
- Turn on the campground power according to the pedestal setup and verify that your RV is receiving power.
- Test a few outlets or appliances once everything is connected.
Common electrical hookup mistakes
- Plugging into the wrong amperage service
- Running too many high-draw appliances at the same time on limited service
- Skipping a surge protector or electrical management system
- Connecting power without checking cords, plugs, or the pedestal first
Sewer hookups: how to connect and dump cleanly
Sewer hookups are the part most beginners worry about, but the process is manageable once you understand the order. The key is to use the right hose, make secure connections, and follow a clean routine every time you dump your tanks.
Gray water and black water explained
Your RV usually stores wastewater in separate tanks. Gray water comes from sinks and showers. Black water comes from the toilet. Both need to be emptied correctly so you avoid odors, clogs, and messy cleanup.
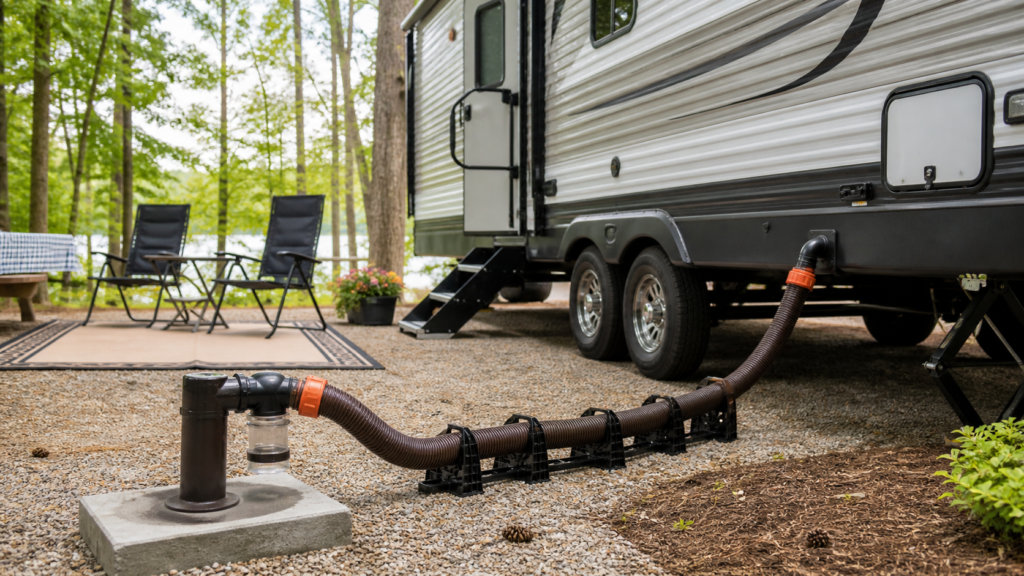
How to connect and dump your sewer hose
- Put on disposable gloves and gather your sewer hose and fittings.
- Connect the sewer hose securely to your RV outlet.
- Run the other end to the campground sewer connection or dump station inlet.
- Make sure the hose has a gentle downward slope and no sharp kinks.
- When dumping, empty the black tank first and then the gray tank to help rinse the hose.
- Close the valves, disconnect carefully, and store the hose in its dedicated compartment.
Common sewer hookup mistakes
- Using loose or poorly fitted connections
- Letting the hose sag or kink
- Rushing the dump process
- Storing sewer gear near fresh water equipment
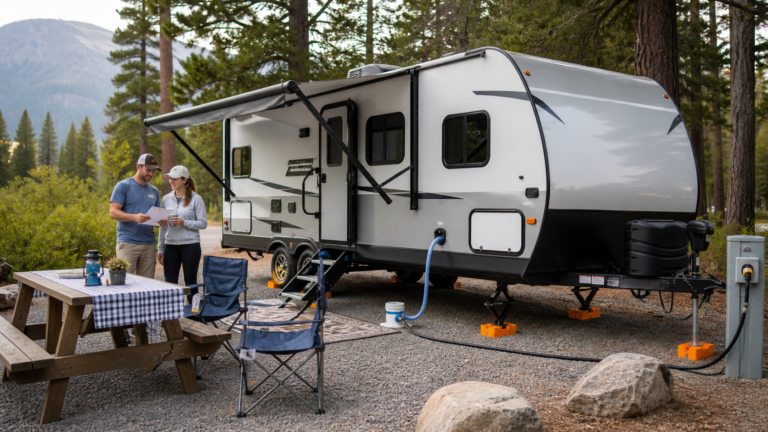
A simple hookup order you can follow at every campsite
One of the easiest ways to feel more confident is to follow the same setup sequence every time you arrive. A repeatable routine helps you catch problems early and reduces the odds of forgetting a step.
- Park, level, and stabilize your RV.
- Connect fresh water using your regulator and potable hose.
- Connect electrical power and confirm everything is working normally.
- Set up the sewer hose last so it stays separate from fresh water gear.
- Test your faucets, lights, outlets, and tank systems before settling in.
This routine keeps your campsite setup organized and makes troubleshooting easier if something does not work the first time.
Quick troubleshooting tips for common hookup problems
- Low or no water pressure: Check the spigot, regulator, and hose for kinks, leaks, or a loose connection.
- No power in the RV: Verify you are plugged into the correct pedestal, check your breakers, and confirm your surge protector is not showing a fault.
- Bad tank odors: Make sure valves are closed properly, connections are secure, and your tanks are being handled with the right dumping routine.
- Leaking connections: Stop and re-seat the fitting before tightening again. Small drips are easier to fix early than after they spread.
FAQ: beginner questions about RV hookups
Do I really need a water pressure regulator?
Yes. It is one of the smartest beginner items to carry because campground water pressure can vary, and a regulator helps protect your RV plumbing from unnecessary stress.
What is the difference between 30-amp and 50-amp service?
The biggest difference for beginners is how much power your RV can comfortably use at one time. Smaller RVs often use 30-amp service, while larger rigs may use 50-amp service for more appliance capacity.
How often should I empty my gray and black tanks?
There is no single schedule that fits every RV. Tank size, number of people, and daily water use all affect how often you need to dump. The important part is to monitor tank levels and avoid waiting until you have a backup or odor problem.
Can I hook up in the rain?
Yes, but take extra care. Work slowly, keep cords and hoses organized, and avoid handling electrical connections during unsafe weather conditions.
What is the best way to learn my RV’s hookup points?
Do a practice run at home before your first campground stay. Find your water inlet, power connection, sewer outlet, tank valves, and storage compartments so you are not learning everything under pressure at check-in time.
Conclusion
RV hookups are one of those skills that feel complicated until you do them a few times. Start with the basics, use the right gear, and follow the same setup order at each campsite. With a potable water hose, a pressure regulator, a surge protector, and a reliable sewer hose kit, you will be much better prepared for smoother campground arrivals and less stressful first trips.